Diese Version dieses Artikels dient zur Verwendung von benutzerdefinierten Repositoryanweisungen auf der GitHub Website. Klicke oben auf die Registerkarten, wenn du Informationen zur Verwendung benutzerdefinierter Anweisungen in anderen Umgebungen möchtest.
Einleitung
Mit benutzerdefinierten Repositoryanweisungen kannst du für Copilot repositoryspezifische Anleitungen und Einstellungen bereitstellen. Weitere Informationen finden Sie unter Informationen zum Anpassen der GitHub Copilot-Antworten.
Voraussetzungen für benutzerdefinierte Repositoryanweisungen
-
Du musst über eine Datei mit benutzerdefinierten Anweisungen verfügen – siehe Anweisungen unten.
-
Um Copilot Codeüberprüfung verwenden zu können, muss die persönliche Auswahl, ob benutzerdefinierte Anweisungen eingesetzt werden sollen, auf "Aktiviert" gesetzt sein. Diese Einstellung ist standardmäßig aktiviert. Details findest du unter Aktivieren oder Deaktivieren benutzerdefinierter Repositoryanweisungen weiter unten in diesem Artikel.
Erstellen von benutzerdefinierten Anweisungen
Copilot unter GitHub unterstützt drei Typen von benutzerdefinierten Repositoryanweisungen. Ausführliche Informationen dazu, welche GitHub Copilot Features diese Arten von Anweisungen unterstützen, finden Sie unter [AUTOTITLE](/copilot/concepts/prompting/response-customization?tool=webui#support-for-repository-custom-instructions).
* Repository-weite angepasste Anweisungen gelten für alle Anfragen, die im Kontext eines Repositorys gestellt werden.
Diese werden in einer copilot-instructions.md-Datei im Verzeichnis .github des Repositorys angegeben. Weitere Informationen findest du unter Erstellen repositoryweiter benutzerdefinierter Anweisungen.
-
**Pfadspezifische angepasste Anweisungen** gelten für Anfragen, die im Kontext von Dateien gestellt werden, die einem bestimmten Pfad entsprechen.Diese werden in einer oder mehreren
NAME.instructions.mdDateien innerhalb oder unterhalb des.github/instructionsVerzeichnisses im Repository spezifiziert. Weitere Informationen findest du unter Erstellen pfadspezifischer benutzerdefinierter Anweisungen.Wenn der von Ihnen angegebene Pfad mit einer Datei Copilot übereinstimmt, an der gearbeitet wird, und auch eine repositoryweite benutzerdefinierte Anweisungendatei vorhanden ist, werden die Anweisungen aus beiden Dateien verwendet.
-
**-Agent-Anweisungen** werden von KI-Agenten verwendet.Du kannst mindestens eine
AGENTS.md-Datei erstellen, die an einer beliebigen Stelle im Repository gespeichert ist. Wenn Copilot arbeitet, hat die nächstgelegeneAGENTS.mdDatei in der Verzeichnisstruktur Vorrang. Weitere Informationen finden Sie im Agentsmd/agents.md-Repository.Alternativ kannst du eine einzelne
CLAUDE.md- oderGEMINI.md-Datei verwenden, die im Stammverzeichnis des Repositorys gespeichert ist.
Erstellen repositoryweiter benutzerdefinierter Anweisungen
Du kannst deine eigene benutzerdefinierte Anleitungsdatei von Grund auf neu erstellen. Weitere Informationen findest du unter Schreiben deiner eigenen „instructions.md“-Datei für Copilot. Alternativ können Sie Copilot Codierungsassistent bitten, eine für Sie zu generieren.
Bitten Sie Copilot Codierungsassistent, eine copilot-instructions.md Datei zu generieren
-
Navigieren Sie zur Registerkarte "Agents" unter github.com/copilot/agents.
Sie können diese Seite auch erreichen, indem Sie auf die Schaltfläche neben der Suchleiste auf einer beliebigen Seite klicken GitHubund dann auf der Randleiste "Agents" auswählen.
-
Wählen Sie im Dropdownmenü im Eingabeaufforderungsfeld das Repository aus, für das Sie benutzerdefinierte Anweisungen generieren möchten Copilot .
-
Kopieren Sie die folgende Aufforderung und fügen Sie sie in das Eingabeaufforderungsfeld ein, indem Sie sie bei Bedarf anpassen:
Markdown Your task is to "onboard" this repository to Copilot coding agent by adding a .github/copilot-instructions.md file in the repository that contains information describing how a coding agent seeing it for the first time can work most efficiently. You will do this task only one time per repository and doing a good job can SIGNIFICANTLY improve the quality of the agent's work, so take your time, think carefully, and search thoroughly before writing the instructions. <Goals> - Reduce the likelihood of a coding agent pull request getting rejected by the user due to generating code that fails the continuous integration build, fails a validation pipeline, or having misbehavior. - Minimize bash command and build failures. - Allow the agent to complete its task more quickly by minimizing the need for exploration using grep, find, str_replace_editor, and code search tools. </Goals> <Limitations> - Instructions must be no longer than 2 pages. - Instructions must not be task specific. </Limitations> <WhatToAdd> Add the following high level details about the codebase to reduce the amount of searching the agent has to do to understand the codebase each time: <HighLevelDetails> - A summary of what the repository does. - High level repository information, such as the size of the repo, the type of the project, the languages, frameworks, or target runtimes in use. </HighLevelDetails> Add information about how to build and validate changes so the agent does not need to search and find it each time. <BuildInstructions> - For each of bootstrap, build, test, run, lint, and any other scripted step, document the sequence of steps to take to run it successfully as well as the versions of any runtime or build tools used. - Each command should be validated by running it to ensure that it works correctly as well as any preconditions and postconditions. - Try cleaning the repo and environment and running commands in different orders and document errors and misbehavior observed as well as any steps used to mitigate the problem. - Run the tests and document the order of steps required to run the tests. - Make a change to the codebase. Document any unexpected build issues as well as the workarounds. - Document environment setup steps that seem optional but that you have validated are actually required. - Document the time required for commands that failed due to timing out. - When you find a sequence of commands that work for a particular purpose, document them in detail. - Use language to indicate when something should always be done. For example: "always run npm install before building". - Record any validation steps from documentation. </BuildInstructions> List key facts about the layout and architecture of the codebase to help the agent find where to make changes with minimal searching. <ProjectLayout> - A description of the major architectural elements of the project, including the relative paths to the main project files, the location of configuration files for linting, compilation, testing, and preferences. - A description of the checks run prior to check in, including any GitHub workflows, continuous integration builds, or other validation pipelines. - Document the steps so that the agent can replicate these itself. - Any explicit validation steps that the agent can consider to have further confidence in its changes. - Dependencies that aren't obvious from the layout or file structure. - Finally, fill in any remaining space with detailed lists of the following, in order of priority: the list of files in the repo root, the contents of the README, the contents of any key source files, the list of files in the next level down of directories, giving priority to the more structurally important and snippets of code from key source files, such as the one containing the main method. </ProjectLayout> </WhatToAdd> <StepsToFollow> - Perform a comprehensive inventory of the codebase. Search for and view: - README.md, CONTRIBUTING.md, and all other documentation files. - Search the codebase for build steps and indications of workarounds like 'HACK', 'TODO', etc. - All scripts, particularly those pertaining to build and repo or environment setup. - All build and actions pipelines. - All project files. - All configuration and linting files. - For each file: - think: are the contents or the existence of the file information that the coding agent will need to implement, build, test, validate, or demo a code change? - If yes: - Document the command or information in detail. - Explicitly indicate which commands work and which do not and the order in which commands should be run. - Document any errors encountered as well as the steps taken to workaround them. - Document any other steps or information that the agent can use to reduce time spent exploring or trying and failing to run bash commands. - Finally, explicitly instruct the agent to trust the instructions and only perform a search if the information in the instructions is incomplete or found to be in error. </StepsToFollow> - Document any errors encountered as well as the steps taken to work-around them.
Your task is to "onboard" this repository to Copilot coding agent by adding a .github/copilot-instructions.md file in the repository that contains information describing how a coding agent seeing it for the first time can work most efficiently. You will do this task only one time per repository and doing a good job can SIGNIFICANTLY improve the quality of the agent's work, so take your time, think carefully, and search thoroughly before writing the instructions. <Goals> - Reduce the likelihood of a coding agent pull request getting rejected by the user due to generating code that fails the continuous integration build, fails a validation pipeline, or having misbehavior. - Minimize bash command and build failures. - Allow the agent to complete its task more quickly by minimizing the need for exploration using grep, find, str_replace_editor, and code search tools. </Goals> <Limitations> - Instructions must be no longer than 2 pages. - Instructions must not be task specific. </Limitations> <WhatToAdd> Add the following high level details about the codebase to reduce the amount of searching the agent has to do to understand the codebase each time: <HighLevelDetails> - A summary of what the repository does. - High level repository information, such as the size of the repo, the type of the project, the languages, frameworks, or target runtimes in use. </HighLevelDetails> Add information about how to build and validate changes so the agent does not need to search and find it each time. <BuildInstructions> - For each of bootstrap, build, test, run, lint, and any other scripted step, document the sequence of steps to take to run it successfully as well as the versions of any runtime or build tools used. - Each command should be validated by running it to ensure that it works correctly as well as any preconditions and postconditions. - Try cleaning the repo and environment and running commands in different orders and document errors and misbehavior observed as well as any steps used to mitigate the problem. - Run the tests and document the order of steps required to run the tests. - Make a change to the codebase. Document any unexpected build issues as well as the workarounds. - Document environment setup steps that seem optional but that you have validated are actually required. - Document the time required for commands that failed due to timing out. - When you find a sequence of commands that work for a particular purpose, document them in detail. - Use language to indicate when something should always be done. For example: "always run npm install before building". - Record any validation steps from documentation. </BuildInstructions> List key facts about the layout and architecture of the codebase to help the agent find where to make changes with minimal searching. <ProjectLayout> - A description of the major architectural elements of the project, including the relative paths to the main project files, the location of configuration files for linting, compilation, testing, and preferences. - A description of the checks run prior to check in, including any GitHub workflows, continuous integration builds, or other validation pipelines. - Document the steps so that the agent can replicate these itself. - Any explicit validation steps that the agent can consider to have further confidence in its changes. - Dependencies that aren't obvious from the layout or file structure. - Finally, fill in any remaining space with detailed lists of the following, in order of priority: the list of files in the repo root, the contents of the README, the contents of any key source files, the list of files in the next level down of directories, giving priority to the more structurally important and snippets of code from key source files, such as the one containing the main method. </ProjectLayout> </WhatToAdd> <StepsToFollow> - Perform a comprehensive inventory of the codebase. Search for and view: - README.md, CONTRIBUTING.md, and all other documentation files. - Search the codebase for build steps and indications of workarounds like 'HACK', 'TODO', etc. - All scripts, particularly those pertaining to build and repo or environment setup. - All build and actions pipelines. - All project files. - All configuration and linting files. - For each file: - think: are the contents or the existence of the file information that the coding agent will need to implement, build, test, validate, or demo a code change? - If yes: - Document the command or information in detail. - Explicitly indicate which commands work and which do not and the order in which commands should be run. - Document any errors encountered as well as the steps taken to workaround them. - Document any other steps or information that the agent can use to reduce time spent exploring or trying and failing to run bash commands. - Finally, explicitly instruct the agent to trust the instructions and only perform a search if the information in the instructions is incomplete or found to be in error. </StepsToFollow> - Document any errors encountered as well as the steps taken to work-around them. -
Click or press Enter.
Copilot will start a new session, which will appear in the list below the prompt box. Copilot will create a draft pull request, write your custom instructions, push them to the branch, then add you as a reviewer when it has finished, triggering a notification.
Writing your own copilot-instructions.md file
-
In the root of your repository, create a file named
.github/copilot-instructions.md.Create the
.githubdirectory if it does not already exist. -
Add natural language instructions to the file, in Markdown format.
Whitespace between instructions is ignored, so the instructions can be written as a single paragraph, each on a new line, or separated by blank lines for legibility.
Tipp
The first time you create a pull request in a given repository with Copilot Codierungsassistent, Copilot will leave a comment with a link to automatically generate custom instructions for the repository.
Creating path-specific custom instructions
Hinweis
Currently, on GitHub.com, path-specific custom instructions are only supported for Copilot Codierungsassistent and Copilot Codeüberprüfung.
-
Erstelle das
.github/instructions-Verzeichnis, wenn es noch nicht vorhanden ist. -
Erstellen Sie optional Unterverzeichnisse von
.github/instructionszur Organisation Ihrer Anleitungsdateien. -
Erstelle mindestens eine
NAME.instructions.md-Datei, in derNAMEden Zweck der Anweisungen angibt. Der Dateiname muss auf.instructions.mdenden. -
Erstelle am Anfang der Datei einen Frontmatterblock, der das Schlüsselwort
applyToenthält. Verwende die Globsyntax, um anzugeben, für welche Dateien oder Verzeichnisse die Anweisungen gelten.Zum Beispiel:
---
applyTo: "app/models/**/*.rb"
---
Du kannst mehrere Muster angeben, indem du sie durch Kommas trennst. Wenn du beispielsweise die Anweisungen auf alle TypeScript-Dateien im Repository anwenden möchtest, kannst du den folgenden Frontmatterblock verwenden:
---
applyTo: "**/*.ts,**/*.tsx"
---
Glob-Beispiele:
-
`*` - entspricht allen Dateien im aktuellen Verzeichnis. -
`**` oder `**/*` - entspricht allen Dateien in allen Verzeichnissen. -
`*.py` - entspricht allen `.py` Dateien im aktuellen Verzeichnis. -
`**/*.py` - stimmt rekursiv mit allen `.py` Dateien in allen Verzeichnissen überein. -
`src/*.py` – entspricht allen `.py` Dateien im `src` Verzeichnis. Beispiel: `src/foo.py` und `src/bar.py`, aber _nicht_`src/foo/bar.py`. -
`src/**/*.py` – stimmt rekursiv mit allen `.py` Dateien im `src` Verzeichnis überein. Beispiel: `src/foo.py`, `src/foo/bar.py`und `src/foo/bar/baz.py`. -
`**/subdir/**/*.py` - wird rekursiv alle `.py`-Dateien in jedem beliebigen `subdir`-Verzeichnis unabhängig von der Tiefe finden. Beispiel: `subdir/foo.py`, `subdir/nested/bar.py`, `parent/subdir/baz.py` und `deep/parent/subdir/nested/qux.py`, aber _nicht_`foo.py` in einem Pfad, der kein `subdir` Verzeichnis enthält.
-
-
Fügen Sie optional das Schlüsselwort
excludeAgentdem Frontmatterblock hinzu, um zu verhindern, dass die Datei von Copilot Codierungsassistent oder Copilot Codeüberprüfung verwendet wird. Verwenden Sie entweder"code-review"oder"coding-agent".Beispielsweise wird die folgende Datei nur von Copilot Codierungsassistent gelesen.
---
applyTo: "**"
excludeAgent: "code-review"
---
Wenn das
excludeAgent-Schlüsselwort nicht im Front-Matterblock enthalten ist, verwenden sowohl Copilot Codeüberprüfung als auch Copilot Codierungsassistent die Anweisungen. -
Füge deine benutzerdefinierten Anweisungen in natürlicher Sprache im Markdownformat hinzu. Leerzeichen zwischen Anweisungen werden ignoriert, d. h. die Anweisungen können in einem Absatz und jeweils in einer neuen Zeile oder für bessere Lesbarkeit durch leere Zeilen getrennt geschrieben werden.
Hast du deinem Repository erfolgreich eine benutzerdefinierte Anweisungendatei hinzugefügt?
          <a href="https://docs.github.io/success-test/yes.html" target="_blank" class="btn btn-outline mt-3 mr-3 no-underline">
          <span>Ja</span></a><a href="https://docs.github.io/success-test/no.html" target="_blank" class="btn btn-outline mt-3 mr-3 no-underline"><span>Nein</span></a>
Benutzerdefinierte Anweisungen im Einsatz
Die Anweisungen in den Dateien stehen zur Verwendung zur Verfügung, sobald Copilot Sie die Datei(en) speichern. Anweisungen werden automatisch zu Anfragen hinzugefügt, die Sie an Copilot übermitteln.
In Copilot-Chat (github.com/copilot), you can start a conversation that uses repository custom instructions by adding, as an attachment, the repository that contains the instructions file.
Whenever repository custom instructions are used by Copilot-Chat, the instructions file is added as a reference for the response that's generated. To find out whether repository custom instructions were used, expand the list of references at the top of a chat response in the Chat panel and check whether the .github/copilot-instructions.md file is listed.

You can click the reference to open the file.
Hinweis
- Mehrere Arten von benutzerdefinierten Anweisungen können auf Anforderungen angewendet werden, die an Copilot gesendet werden. Persönliche Anweisungen haben höchste Priorität. Anweisungen für das Repository kommen als Nächstes, und dann werden Organisations-Anweisungen zuletzt priorisiert. Alle Sets mit relevanten Anweisungen werden jedoch Copilot zur Verfügung gestellt.
- Versuchen Sie, wann immer möglich, konfliktende Sätze von Anweisungen zu vermeiden. Wenn Sie sich Sorgen um die Antwortqualität machen, können Sie die Anweisungen im Repository vorübergehend deaktivieren. Weitere Informationen findest du unter Hinzufügen von benutzerdefinierten Repositoryanweisungen für GitHub Copilot.
Enabling or disabling custom instructions for Copilot Codeüberprüfung
Custom instructions are enabled for Copilot Codeüberprüfung by default but you can disable, or re-enable, them in the repository settings on GitHub.com. This applies to Copilot's use of custom instructions for all code reviews it performs in this repository.
-
Navigieren Sie auf GitHub zur Hauptseite des Repositorys.
-
Klicke unter dem Repositorynamen auf Settings. Wenn die Registerkarte „Einstellungen“ nicht angezeigt wird, wähle im Dropdownmenü die Option Einstellungen aus.

-
In the "Code & automation" section of the sidebar, click Copilot, then Code review.
-
Toggle the “Use custom instructions when reviewing pull requests” option on or off.

Hinweis
Beim Überprüfen eines Pull Requests verwendet Copilot die benutzerdefinierten Anweisungen im Basisbranch des Pull Requests. Wenn Ihr Pull Request beispielsweise darauf abzielt, my-feature-branch in main zusammenzuführen, verwendet Copilot die benutzerdefinierten Anweisungen in main.
Further reading
This version of this article is for using repository custom instructions and prompt files in VS Code. Click the tabs above for instructions on using custom instructions in other environments.
Einleitung
Mit benutzerdefinierten Repositoryanweisungen kannst du für Copilot repositoryspezifische Anleitungen und Einstellungen bereitstellen. Weitere Informationen finden Sie unter Informationen zum Anpassen der GitHub Copilot-Antworten.
Voraussetzungen für benutzerdefinierte Repositoryanweisungen
-
Du musst über eine Datei mit benutzerdefinierten Anweisungen verfügen – siehe Anweisungen unten.
-
Custom instructions must be enabled. This feature is enabled by default. See Enabling or disabling repository custom instructions later in this article.
Creating custom instructions
VS Code supports three types of repository custom instructions. For details of which GitHub Copilot features support these types of instructions, see Informationen zum Anpassen der GitHub Copilot-Antworten.
-
Repository-wide custom instructions, which apply to all requests made in the context of a repository.
These are specified in a
copilot-instructions.mdfile in the.githubdirectory of the repository. See Creating repository-wide custom instructions. -
Path-specific custom instructions, which apply to requests made in the context of files that match a specified path.
These are specified in one or more
NAME.instructions.mdfiles within or below the.github/instructionsdirectory in the repository. See Creating path-specific custom instructions.If the path you specify matches a file that Copilot is working on, and a repository-wide custom instructions file also exists, then the instructions from both files are used.
-
Agent instructions are used by AI agents.
Du kannst mindestens eine
AGENTS.md-Datei erstellen, die an einer beliebigen Stelle im Repository gespeichert ist. Wenn Copilot arbeitet, hat die nächstgelegeneAGENTS.mdDatei in der Verzeichnisstruktur Vorrang. Weitere Informationen finden Sie im Agentsmd/agents.md-Repository.Hinweis
Support of
AGENTS.mdfiles outside of the workspace root is currently turned off by default. For details of how to enable this feature, see Use custom instructions in VS Code in the VS Code documentation.
Creating repository-wide custom instructions
-
In the root of your repository, create a file named
.github/copilot-instructions.md.Create the
.githubdirectory if it does not already exist. -
Add natural language instructions to the file, in Markdown format.
Whitespace between instructions is ignored, so the instructions can be written as a single paragraph, each on a new line, or separated by blank lines for legibility.
Creating path-specific custom instructions
-
Erstelle das
.github/instructions-Verzeichnis, wenn es noch nicht vorhanden ist. -
Erstellen Sie optional Unterverzeichnisse von
.github/instructionszur Organisation Ihrer Anleitungsdateien. -
Erstelle mindestens eine
NAME.instructions.md-Datei, in derNAMEden Zweck der Anweisungen angibt. Der Dateiname muss auf.instructions.mdenden. -
Erstelle am Anfang der Datei einen Frontmatterblock, der das Schlüsselwort
applyToenthält. Verwende die Globsyntax, um anzugeben, für welche Dateien oder Verzeichnisse die Anweisungen gelten.Zum Beispiel:
---
applyTo: "app/models/**/*.rb"
---
Du kannst mehrere Muster angeben, indem du sie durch Kommas trennst. Wenn du beispielsweise die Anweisungen auf alle TypeScript-Dateien im Repository anwenden möchtest, kannst du den folgenden Frontmatterblock verwenden:
---
applyTo: "**/*.ts,**/*.tsx"
---
Glob-Beispiele:
-
`*` - entspricht allen Dateien im aktuellen Verzeichnis. -
`**` oder `**/*` - entspricht allen Dateien in allen Verzeichnissen. -
`*.py` - entspricht allen `.py` Dateien im aktuellen Verzeichnis. -
`**/*.py` - stimmt rekursiv mit allen `.py` Dateien in allen Verzeichnissen überein. -
`src/*.py` – entspricht allen `.py` Dateien im `src` Verzeichnis. Beispiel: `src/foo.py` und `src/bar.py`, aber _nicht_`src/foo/bar.py`. -
`src/**/*.py` – stimmt rekursiv mit allen `.py` Dateien im `src` Verzeichnis überein. Beispiel: `src/foo.py`, `src/foo/bar.py`und `src/foo/bar/baz.py`. -
`**/subdir/**/*.py` - wird rekursiv alle `.py`-Dateien in jedem beliebigen `subdir`-Verzeichnis unabhängig von der Tiefe finden. Beispiel: `subdir/foo.py`, `subdir/nested/bar.py`, `parent/subdir/baz.py` und `deep/parent/subdir/nested/qux.py`, aber _nicht_`foo.py` in einem Pfad, der kein `subdir` Verzeichnis enthält.
-
-
Fügen Sie optional das Schlüsselwort
excludeAgentdem Frontmatterblock hinzu, um zu verhindern, dass die Datei von Copilot Codierungsassistent oder Copilot Codeüberprüfung verwendet wird. Verwenden Sie entweder"code-review"oder"coding-agent".Beispielsweise wird die folgende Datei nur von Copilot Codierungsassistent gelesen.
---
applyTo: "**"
excludeAgent: "code-review"
---
Wenn das
excludeAgent-Schlüsselwort nicht im Front-Matterblock enthalten ist, verwenden sowohl Copilot Codeüberprüfung als auch Copilot Codierungsassistent die Anweisungen. -
Füge deine benutzerdefinierten Anweisungen in natürlicher Sprache im Markdownformat hinzu. Leerzeichen zwischen Anweisungen werden ignoriert, d. h. die Anweisungen können in einem Absatz und jeweils in einer neuen Zeile oder für bessere Lesbarkeit durch leere Zeilen getrennt geschrieben werden.
Hast du deinem Repository erfolgreich eine benutzerdefinierte Anweisungendatei hinzugefügt?
          <a href="https://docs.github.io/success-test/yes.html" target="_blank" class="btn btn-outline mt-3 mr-3 no-underline">
          <span>Ja</span></a><a href="https://docs.github.io/success-test/no.html" target="_blank" class="btn btn-outline mt-3 mr-3 no-underline"><span>Nein</span></a>
Benutzerdefinierte Anweisungen im Einsatz
Die Anweisungen in den Dateien stehen zur Verwendung zur Verfügung, sobald Copilot Sie die Datei(en) speichern. Anweisungen werden automatisch zu Anfragen hinzugefügt, die Sie an Copilot übermitteln.
Benutzerdefinierte Anweisungen werden nicht in der Chat-Ansicht oder dem Inlinechat angezeigt. Du kannst jedoch in der Referenzliste einer Antwort in der Chat-Ansicht nachsehen, ob sie von Copilot verwendet werden. Wenn dem Prompt, der an das Modell übermittelt wurde, benutzerdefinierte Anweisungen hinzugefügt wurden, dient die .github/copilot-instructions.md-Datei als Referenz. Du kannst auf die Referenz klicken, um die Datei zu öffnen.

Aktivieren oder Deaktivieren benutzerdefinierter Repositoryanweisungen
Du kannst auswählen, ob Copilot repositorybasierte benutzerdefinierte Anweisungen verwenden soll.
Aktivieren oder Deaktivieren benutzerdefinierter Anweisungen für Copilot-Chat
Benutzerdefinierte Anweisungen sind standardmäßig für Copilot-Chat aktiviert, sie können jedoch jederzeit deaktiviert oder erneut aktiviert werden. Dies gilt für deine eigene Verwendung von Copilot-Chat und betrifft keine anderen Benutzenden.
- Open the Setting editor by using the keyboard shortcut Command+, (Mac) / Ctrl+, (Linux/Windows).
- Type
instruction filein the search box. - Select or clear the checkbox under Code Generation: Use Instruction Files.
Aktivieren oder Deaktivieren benutzerdefinierter Anweisungen für Copilot Codeüberprüfung
Benutzerdefinierte Anweisungen sind für Copilot Codeüberprüfung standardmäßig aktiviert. Du kannst sie aber in den Repositoryeinstellungen auf GitHub.com deaktivieren oder erneut aktivieren. Dies gilt für die Nutzung benutzerdefinierter Anweisungen durch Copilot für alle Reviews, die für dieses Repository durchgeführt werden.
- Klicke im Abschnitt „Code & automation“ der Randleiste auf Copilot und dann auf Code review.
- Aktiviere oder deaktiviere die Option „Use custom instructions when reviewing pull requests“ mithilfe der Umschaltfläche.
Enabling and using prompt files
Hinweis
- Copilot-Promptdateien befinden sich in der öffentliche Vorschau. Änderungen sind vorbehalten. Promptdateien sind nur in VS Code, Visual Studio und JetBrains-IDEs verfügbar. Siehe Informationen zum Anpassen der GitHub Copilot-Antworten.
- Beispiele für von der Community bereitgestellte Promptdateien für bestimmte Sprachen und Szenarios findest du im Repository Großartige GitHub Copilot-Anpassungen.
Prompt files let you build and share reusable prompt instructions with additional context. A prompt file is a Markdown file, stored in your workspace, that mimics the existing format of writing prompts in Copilot-Chat (for example, Rewrite #file:x.ts). You can have multiple prompt files in your workspace, each of which defines a prompt for a different purpose.
Enabling prompt files
To enable prompt files, configure the workspace settings.
- Open the command palette by pressing Ctrl+Shift+P (Windows/Linux) / Command+Shift+P (Mac).
- Type "Open Workspace Settings (JSON)" and select the option that's displayed.
- In the
settings.jsonfile, add"chat.promptFiles": trueto enable the.github/promptsfolder as the location for prompt files. This folder will be created if it does not already exist.
Creating prompt files
-
Open the command palette by pressing Ctrl+Shift+P (Windows/Linux) / Command+Shift+P (Mac).
-
Type "prompt" and select Chat: Create Prompt.
-
Enter a name for the prompt file, excluding the
.prompt.mdfile name extension. The name can contain alphanumeric characters and spaces and should describe the purpose of the prompt information the file will contain. -
Write the prompt instructions, using Markdown formatting.
You can reference other files in the workspace by using Markdown links—for example,
[index](../../web/index.ts)—or by using the#file:../../web/index.tssyntax. Paths are relative to the prompt file. Referencing other files allows you to provide additional context, such as API specifications or product documentation.
Using prompt files
-
At the bottom of the Copilot-Chat view, click the Attach context icon ().
-
In the dropdown menu, click Prompt... and choose the prompt file you want to use.
-
Optionally, attach additional files, including prompt files, to provide more context.
-
Optionally, type additional information in the chat prompt box.
Whether you need to do this or not depends on the contents of the prompt you are using.
-
Submit the chat prompt.
For more information about prompt files, see Use prompt files in Visual Studio Code in the Visual Studio Code documentation.
Further reading
This version of this article is for using repository custom instructions and prompt files in Visual Studio. Click the tabs above for instructions on using custom instructions in other environments.
Einleitung
Mit benutzerdefinierten Repositoryanweisungen kannst du für Copilot repositoryspezifische Anleitungen und Einstellungen bereitstellen. Weitere Informationen finden Sie unter Informationen zum Anpassen der GitHub Copilot-Antworten.
Voraussetzungen für benutzerdefinierte Repositoryanweisungen
-
Du musst über eine Datei mit benutzerdefinierten Anweisungen verfügen – siehe Anweisungen unten.
-
The Enable custom instructions... option must be enabled in your settings. This is enabled by default. See Enabling or disabling repository custom instructions later in this article.
Creating custom instructions
Visual Studio supports two types of custom instructions. For details of which GitHub Copilot features support these types of instructions, see Informationen zum Anpassen der GitHub Copilot-Antworten.
-
Repository-wide custom instructions, which apply to all requests made in the context of a repository.
These are specified in a
copilot-instructions.mdfile in the.githubdirectory of the repository. See Creating repository-wide custom instructions. -
Path-specific custom instructions, which apply to requests made in the context of files that match a specified path.
These are specified in one or more
NAME.instructions.mdfiles within or below the.github/instructionsdirectory in the repository. See Creating path-specific custom instructions.If the path you specify matches a file that Copilot is working on, and a repository-wide custom instructions file also exists, then the instructions from both files are used.
Creating repository-wide custom instructions
-
In the root of your repository, create a file named
.github/copilot-instructions.md.Create the
.githubdirectory if it does not already exist. -
Add natural language instructions to the file, in Markdown format.
Whitespace between instructions is ignored, so the instructions can be written as a single paragraph, each on a new line, or separated by blank lines for legibility.
Creating path-specific custom instructions
-
Erstelle das
.github/instructions-Verzeichnis, wenn es noch nicht vorhanden ist. -
Erstellen Sie optional Unterverzeichnisse von
.github/instructionszur Organisation Ihrer Anleitungsdateien. -
Erstelle mindestens eine
NAME.instructions.md-Datei, in derNAMEden Zweck der Anweisungen angibt. Der Dateiname muss auf.instructions.mdenden. -
Erstelle am Anfang der Datei einen Frontmatterblock, der das Schlüsselwort
applyToenthält. Verwende die Globsyntax, um anzugeben, für welche Dateien oder Verzeichnisse die Anweisungen gelten.Zum Beispiel:
---
applyTo: "app/models/**/*.rb"
---
Du kannst mehrere Muster angeben, indem du sie durch Kommas trennst. Wenn du beispielsweise die Anweisungen auf alle TypeScript-Dateien im Repository anwenden möchtest, kannst du den folgenden Frontmatterblock verwenden:
---
applyTo: "**/*.ts,**/*.tsx"
---
Glob-Beispiele:
-
`*` - entspricht allen Dateien im aktuellen Verzeichnis. -
`**` oder `**/*` - entspricht allen Dateien in allen Verzeichnissen. -
`*.py` - entspricht allen `.py` Dateien im aktuellen Verzeichnis. -
`**/*.py` - stimmt rekursiv mit allen `.py` Dateien in allen Verzeichnissen überein. -
`src/*.py` – entspricht allen `.py` Dateien im `src` Verzeichnis. Beispiel: `src/foo.py` und `src/bar.py`, aber _nicht_`src/foo/bar.py`. -
`src/**/*.py` – stimmt rekursiv mit allen `.py` Dateien im `src` Verzeichnis überein. Beispiel: `src/foo.py`, `src/foo/bar.py`und `src/foo/bar/baz.py`. -
`**/subdir/**/*.py` - wird rekursiv alle `.py`-Dateien in jedem beliebigen `subdir`-Verzeichnis unabhängig von der Tiefe finden. Beispiel: `subdir/foo.py`, `subdir/nested/bar.py`, `parent/subdir/baz.py` und `deep/parent/subdir/nested/qux.py`, aber _nicht_`foo.py` in einem Pfad, der kein `subdir` Verzeichnis enthält.
-
-
Fügen Sie optional das Schlüsselwort
excludeAgentdem Frontmatterblock hinzu, um zu verhindern, dass die Datei von Copilot Codierungsassistent oder Copilot Codeüberprüfung verwendet wird. Verwenden Sie entweder"code-review"oder"coding-agent".Beispielsweise wird die folgende Datei nur von Copilot Codierungsassistent gelesen.
---
applyTo: "**"
excludeAgent: "code-review"
---
Wenn das
excludeAgent-Schlüsselwort nicht im Front-Matterblock enthalten ist, verwenden sowohl Copilot Codeüberprüfung als auch Copilot Codierungsassistent die Anweisungen. -
Füge deine benutzerdefinierten Anweisungen in natürlicher Sprache im Markdownformat hinzu. Leerzeichen zwischen Anweisungen werden ignoriert, d. h. die Anweisungen können in einem Absatz und jeweils in einer neuen Zeile oder für bessere Lesbarkeit durch leere Zeilen getrennt geschrieben werden.
Hast du deinem Repository erfolgreich eine benutzerdefinierte Anweisungendatei hinzugefügt?
          <a href="https://docs.github.io/success-test/yes.html" target="_blank" class="btn btn-outline mt-3 mr-3 no-underline">
          <span>Ja</span></a><a href="https://docs.github.io/success-test/no.html" target="_blank" class="btn btn-outline mt-3 mr-3 no-underline"><span>Nein</span></a>
Benutzerdefinierte Anweisungen im Einsatz
Die Anweisungen in den Dateien stehen zur Verwendung zur Verfügung, sobald Copilot Sie die Datei(en) speichern. Anweisungen werden automatisch zu Anfragen hinzugefügt, die Sie an Copilot übermitteln.
Benutzerdefinierte Anweisungen werden nicht in der Chat-Ansicht oder dem Inlinechat angezeigt. Du kannst jedoch in der Referenzliste einer Antwort in der Chat-Ansicht nachsehen, ob sie von Copilot verwendet werden. Wenn dem Prompt, der an das Modell übermittelt wurde, benutzerdefinierte Anweisungen hinzugefügt wurden, dient die .github/copilot-instructions.md-Datei als Referenz. Du kannst auf die Referenz klicken, um die Datei zu öffnen.

Aktivieren oder Deaktivieren benutzerdefinierter Repositoryanweisungen
Du kannst auswählen, ob Copilot repositorybasierte benutzerdefinierte Anweisungen verwenden soll.
Aktivieren oder Deaktivieren benutzerdefinierter Anweisungen für Copilot-Chat
Benutzerdefinierte Anweisungen sind standardmäßig für Copilot-Chat aktiviert, sie können jedoch jederzeit deaktiviert oder erneut aktiviert werden. Dies gilt für deine eigene Verwendung von Copilot-Chat und betrifft keine anderen Benutzenden.
-
In the Visual Studio menu bar, under Tools, click Options.
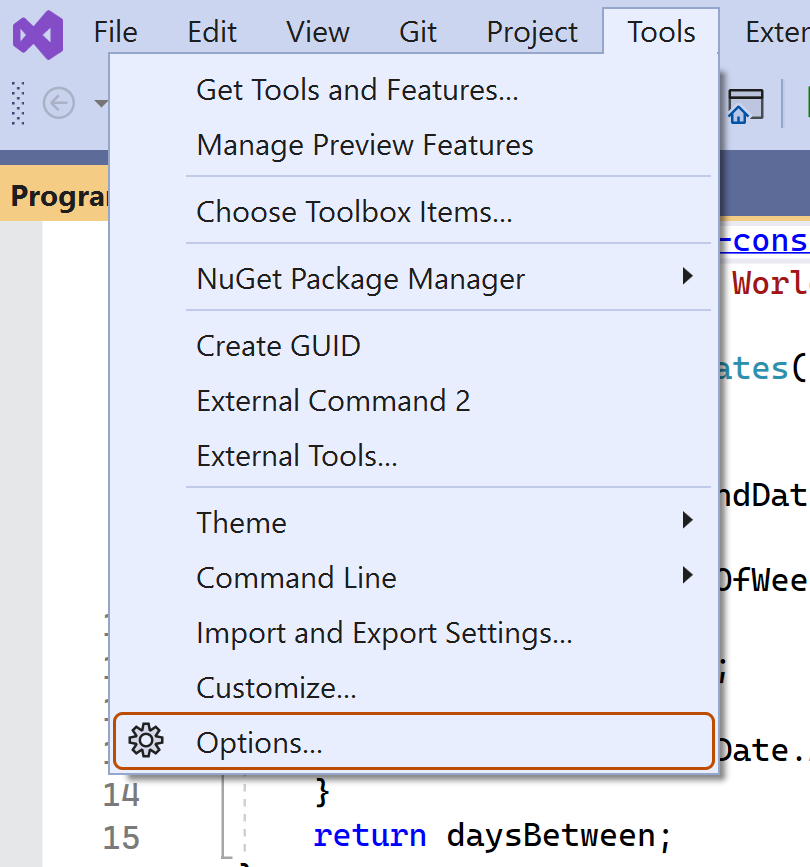
-
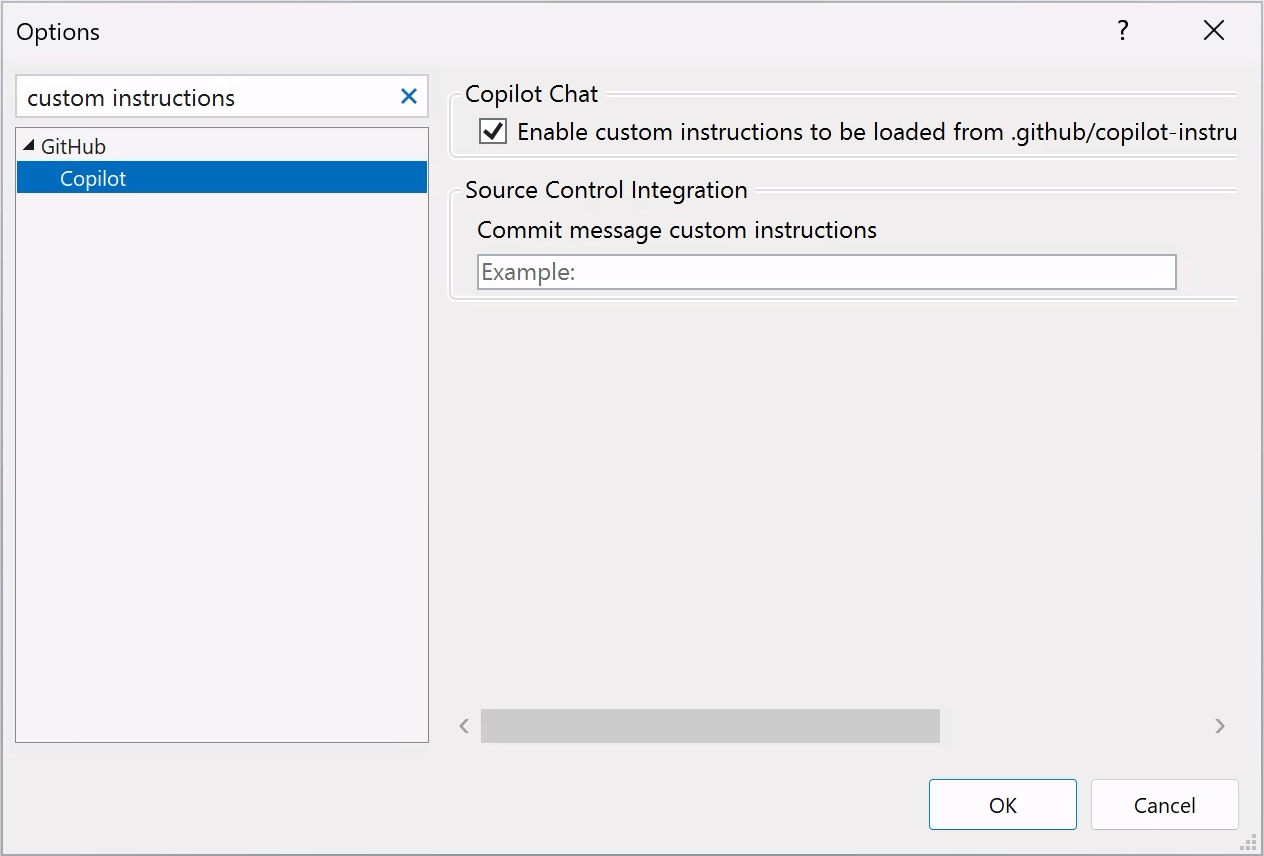
In the "Options" dialog, type
custom instructionsin the search box, then click Copilot. -
Select or clear the checkbox for Enable custom instructions to be loaded from .github/copilot-instructions.md files and added to requests.


Aktivieren oder Deaktivieren benutzerdefinierter Anweisungen für Copilot Codeüberprüfung
Benutzerdefinierte Anweisungen sind für Copilot Codeüberprüfung standardmäßig aktiviert. Du kannst sie aber in den Repositoryeinstellungen auf GitHub.com deaktivieren oder erneut aktivieren. Dies gilt für die Nutzung benutzerdefinierter Anweisungen durch Copilot für alle Reviews, die für dieses Repository durchgeführt werden.
- Klicke im Abschnitt „Code & automation“ der Randleiste auf Copilot und dann auf Code review.
- Aktiviere oder deaktiviere die Option „Use custom instructions when reviewing pull requests“ mithilfe der Umschaltfläche.
Using prompt files
Hinweis
- Copilot-Promptdateien befinden sich in der öffentliche Vorschau. Änderungen sind vorbehalten. Promptdateien sind nur in VS Code, Visual Studio und JetBrains-IDEs verfügbar. Siehe Informationen zum Anpassen der GitHub Copilot-Antworten.
- Beispiele für von der Community bereitgestellte Promptdateien für bestimmte Sprachen und Szenarios findest du im Repository Großartige GitHub Copilot-Anpassungen.
Prompt files let you build and share reusable prompt instructions with additional context. A prompt file is a Markdown file, stored in your workspace, that mimics the existing format of writing prompts in Copilot-Chat (for example, Rewrite #file:x.ts). You can have multiple prompt files in your workspace, each of which defines a prompt for a different purpose.
Creating prompt files
-
Add a prompt file, including the
.prompt.mdfile name extension inside the.github/promptsfolder in the root of the repository. The name can contain alphanumeric characters and spaces and should describe the purpose of the prompt information the file will contain. -
Write the prompt instructions, using Markdown formatting.
You can reference other files in the workspace by using Markdown links—for example,
[index](../../web/index.ts)—or by using the#file:'../../web/index.ts'syntax. Paths are relative to the prompt file. Referencing other files allows you to provide additional context, such as API specifications or product documentation.
For more information about prompt files, see Use prompt files in Visual Studio in the Visual Studio documentation.
Further reading
This version of this article is for using repository custom instructions in JetBrains IDEs. Click the tabs above for instructions on using custom instructions in other environments.
Einleitung
Mit benutzerdefinierten Repositoryanweisungen kannst du für Copilot repositoryspezifische Anleitungen und Einstellungen bereitstellen. Weitere Informationen finden Sie unter Informationen zum Anpassen der GitHub Copilot-Antworten.
Voraussetzungen für benutzerdefinierte Repositoryanweisungen
-
Du musst über eine Datei mit benutzerdefinierten Anweisungen verfügen – siehe Anweisungen unten.
-
The latest version of the Copilot extension must be installed in your JetBrains IDE.
Creating custom instructions
JetBrains IDEs support a single .github/copilot-instructions.md custom instructions file stored in the repository, and a locally stored global-copilot-instructions.md file.
You can create the .github/copilot-instructions.md file in your repository using the Copilot settings page, or you can create the file manually.
Whitespace between instructions is ignored, so the instructions can be written as a single paragraph, each on a new line, or separated by blank lines for legibility.
Using the settings page
- Klicken Sie in Ihrer JetBrains-IDE auf das Menü Datei (Windows) oder den Namen der Anwendung in der Menüleiste (macOS), und klicken Sie dann auf Einstellungen.
- Klicken Sie in der linken Seitenleiste auf Extras, klicken Sie auf GitHub Copilot, then click Customizations.
- Under "Copilot Instructions", click Workspace or Global to choose whether the custom instructions apply to the current workspace or all workspaces.
Manually creating a workspace custom instructions file
-
In the root of your repository, create a file named
.github/copilot-instructions.md.Create the
.githubdirectory if it does not already exist. -
Add natural language instructions to the file, in Markdown format.
Once saved, these instructions will apply to the current workspace in JetBrains IDEs that you open with Copilot enabled.
Manually creating a global custom instructions file
To apply the same instructions across all workspaces in JetBrains IDEs, you can create a global custom instructions file on your local machine.
-
Open your file explorer or terminal.
-
Navigate to the appropriate location for your operating system:
- macOS:
/Users/YOUR-USERNAME/.config/github-copilot/intellij/ - Windows:
C:\Users\YOUR-USERNAME\AppData\Local\github-copilot\intellij\
- macOS:
-
Create a file named
global-copilot-instructions.mdin that directory. -
Add your custom instructions in natural language, using Markdown format.
Once saved, these instructions will apply globally across all workspaces in JetBrains IDEs that you open with Copilot enabled.
Hast du deinem Repository erfolgreich eine benutzerdefinierte Anweisungendatei hinzugefügt?
          <a href="https://docs.github.io/success-test/yes.html" target="_blank" class="btn btn-outline mt-3 mr-3 no-underline">
          <span>Ja</span></a><a href="https://docs.github.io/success-test/no.html" target="_blank" class="btn btn-outline mt-3 mr-3 no-underline"><span>Nein</span></a>
Benutzerdefinierte Anweisungen im Einsatz
Die Anweisungen in den Dateien stehen zur Verwendung zur Verfügung, sobald Copilot Sie die Datei(en) speichern. Anweisungen werden automatisch zu Anfragen hinzugefügt, die Sie an Copilot übermitteln.
Benutzerdefinierte Anweisungen werden nicht in der Chat-Ansicht oder dem Inlinechat angezeigt. Du kannst jedoch in der Referenzliste einer Antwort in der Chat-Ansicht nachsehen, ob sie von Copilot verwendet werden. Wenn dem Prompt, der an das Modell übermittelt wurde, benutzerdefinierte Anweisungen hinzugefügt wurden, dient die .github/copilot-instructions.md-Datei als Referenz. Du kannst auf die Referenz klicken, um die Datei zu öffnen.
Using prompt files
Hinweis
- Copilot-Promptdateien befinden sich in der öffentliche Vorschau. Änderungen sind vorbehalten. Promptdateien sind nur in VS Code, Visual Studio und JetBrains-IDEs verfügbar. Siehe Informationen zum Anpassen der GitHub Copilot-Antworten.
- Beispiele für von der Community bereitgestellte Promptdateien für bestimmte Sprachen und Szenarios findest du im Repository Großartige GitHub Copilot-Anpassungen.
Prompt files let you build and share reusable prompt instructions with additional context. A prompt file is a Markdown file, stored in your workspace, that mimics the existing format of writing prompts in Copilot-Chat (for example, Rewrite #file:x.ts). You can have multiple prompt files in your workspace, each of which defines a prompt for a different purpose.
When writing prompt instructions, you can reference other files in the workspace by using Markdown links—for example, [index](../../web/index.ts)—or by using the #file:../../web/index.ts syntax. Paths are relative to the prompt file. Referencing other files allows you to provide additional context, such as API specifications or product documentation.
Once prompt files are saved, their instructions will apply to the current workspace in JetBrains IDEs that you open with Copilot enabled.
Creating prompt files using the command line
- Create the
.github/promptsdirectory if it doesn't already exist in your workspace. This directory will be the location for your prompt files. - Create a prompt file in the
.github/promptsdirectory. The prompt file name can contain alphanumeric characters and spaces and should describe the purpose of the prompt information the file will contain. The file name must end with the.prompt.mdfile name extension, for exampleTESTPROMPT.prompt.md. - Write the prompt instructions using Markdown formatting, and save the file.
Creating prompt files using the settings page
- Klicken Sie in Ihrer JetBrains-IDE auf das Menü Datei (Windows) oder den Namen der Anwendung in der Menüleiste (macOS), und klicken Sie dann auf Einstellungen.
- Under Tools, under GitHub Copilot, click Edit Settings.
- Under "Settings Categories", click Customizations.
- Under "Prompt Files", click Workspace, to create a prompt file in your workspace.
- Enter a name for the prompt file, excluding the
.prompt.mdfile name extension. The prompt file name can contain alphanumeric characters and spaces and should describe the purpose of the prompt information the file will contain. - Click Ok to save the prompt file name.
- Write the prompt instructions using Markdown formatting, and save the file.
Using prompt files
-
In the chat input box, type
/followed by the name of the prompt file. For example,/TESTPROMPT. -
Optionally, attach additional files, to provide more context.
-
Optionally, type additional information in the chat prompt box.
Whether you need to do this or not depends on the contents of the prompt you are using.
-
Submit the chat prompt.
Further reading
This version of this article is for using repository custom instructions in Xcode. Click the tabs above for instructions on using custom instructions in other environments.
Einleitung
Mit benutzerdefinierten Repositoryanweisungen kannst du für Copilot repositoryspezifische Anleitungen und Einstellungen bereitstellen. Weitere Informationen finden Sie unter Informationen zum Anpassen der GitHub Copilot-Antworten.
Voraussetzungen für benutzerdefinierte Repositoryanweisungen
-
Du musst über eine Datei mit benutzerdefinierten Anweisungen verfügen – siehe Anweisungen unten.
-
The latest version of the Copilot extension must be installed in Xcode.
Creating custom instructions
Xcode supports a single .github/copilot-instructions.md custom instructions file stored in the repository.
You can create a custom instructions file in your repository via the Copilot settings page.
Whitespace between instructions is ignored, so the instructions can be written as a single paragraph, each on a new line, or separated by blank lines for legibility.
- Open the GitHub Copilot for Xcode application.
- At the top of the application window, under Settings, click Advanced.
- To the right of "Custom Instructions", click Current Workspace or Global to choose whether the custom instructions apply to the current workspace or all workspaces.
Hast du deinem Repository erfolgreich eine benutzerdefinierte Anweisungendatei hinzugefügt?
          <a href="https://docs.github.io/success-test/yes.html" target="_blank" class="btn btn-outline mt-3 mr-3 no-underline">
          <span>Ja</span></a><a href="https://docs.github.io/success-test/no.html" target="_blank" class="btn btn-outline mt-3 mr-3 no-underline"><span>Nein</span></a>
Benutzerdefinierte Anweisungen im Einsatz
Die Anweisungen in den Dateien stehen zur Verwendung zur Verfügung, sobald Copilot Sie die Datei(en) speichern. Anweisungen werden automatisch zu Anfragen hinzugefügt, die Sie an Copilot übermitteln.
Benutzerdefinierte Anweisungen werden nicht in der Chat-Ansicht oder dem Inlinechat angezeigt. Du kannst jedoch in der Referenzliste einer Antwort in der Chat-Ansicht nachsehen, ob sie von Copilot verwendet werden. Wenn dem Prompt, der an das Modell übermittelt wurde, benutzerdefinierte Anweisungen hinzugefügt wurden, dient die .github/copilot-instructions.md-Datei als Referenz. Du kannst auf die Referenz klicken, um die Datei zu öffnen.
Further reading
Hinweis
This feature is currently in öffentliche Vorschau and is subject to change.
This version of this article is for using repository custom instructions in Eclipse. Click the tabs above for instructions on using custom instructions in other environments.
Einleitung
Mit benutzerdefinierten Repositoryanweisungen kannst du für Copilot repositoryspezifische Anleitungen und Einstellungen bereitstellen. Weitere Informationen finden Sie unter Informationen zum Anpassen der GitHub Copilot-Antworten.
Voraussetzungen für benutzerdefinierte Repositoryanweisungen
-
Du musst über eine Datei mit benutzerdefinierten Anweisungen verfügen – siehe Anweisungen unten.
-
The latest version of the Copilot extension must be installed in Eclipse.
Creating custom instructions
Eclipse supports two types of repository custom instructions: workspace and project custom instructions.
To create a workspace custom instructions file, you can use the Copilot settings page. To create a project custom instructions file, you can create the file manually in the project directory.
Whitespace between instructions is ignored, so the instructions can be written as a single paragraph, each on a new line, or separated by blank lines for legibility.
Creating a workspace custom instructions file
- To open the Copilot-Chat panel, click the Copilot icon () in the status bar at the bottom of Eclipse.
- From the menu, select "Edit preferences".
- In the left pane, expand GitHub Copilot and click Custom Instructions.
- Select Enable workspace instructions.
- In the "Workspace" section, under "Set custom instructions to guide Copilot's code suggestions in this workspace", add natural language instructions to the file, in Markdown format.
Creating a project custom instructions file
- In the root of your project directory, create a file named
.github/copilot-instructions.md. - Add your custom instructions in natural language, using Markdown format.
Once saved, these instructions will apply to the current project in Eclipse that you open with Copilot enabled.
Hast du deinem Repository erfolgreich eine benutzerdefinierte Anweisungendatei hinzugefügt?
          <a href="https://docs.github.io/success-test/yes.html" target="_blank" class="btn btn-outline mt-3 mr-3 no-underline">
          <span>Ja</span></a><a href="https://docs.github.io/success-test/no.html" target="_blank" class="btn btn-outline mt-3 mr-3 no-underline"><span>Nein</span></a>
Benutzerdefinierte Anweisungen im Einsatz
Die Anweisungen in den Dateien stehen zur Verwendung zur Verfügung, sobald Copilot Sie die Datei(en) speichern. Anweisungen werden automatisch zu Anfragen hinzugefügt, die Sie an Copilot übermitteln.
Further reading
- Unterstützung für verschiedene Arten von benutzerdefinierten Anweisungen
- Benutzerdefinierte Anweisungen—a curated collection of examples